Contents:
- The Bisect Tool
- Cut by Projection: An Innovative Approach to Creating Unique Geometry
- How to Create a Through Hole in 3D Modeling
- Proportional Editing: A Revolution in Modeling
- Efficient Selection Methods in 3D Modeling
- Efficient Use of UV Unwrapping: Displaying Vertices and Edges
- Symmetry Without Modifiers: Life Hack #7
- Selective Anti-Aliasing Technique
- Creating Symmetrical Forms Using Radial Symmetry
- Effective Life Hacks for Working with Blender
3D Modeling in Blender: A Free Course from Scratch
Learn MoreBlender offers a wide range of options for creating 3D art, but many functions can be non-obvious due to the abundance of tabs and complex keyboard shortcuts. We've compiled some helpful tips for beginners that will help simplify the modeling process and speed up the mastery of this powerful program. These tips will help you use Blender's tools more effectively and accelerate your creativity in 3D design.
Bisect Tool
The Bisect tool is ideal for splitting a mesh at a specific angle. You can find it in the Mesh section or activate it from the toolbar by holding down the Knife icon. Unlike the Knife, which allows you to manually create new topology, the Bisect tool makes a straight cut through selected faces. This significantly speeds up the modeling process and simplifies working with geometry. This tool is especially useful when creating complex shapes and objects that require precision and accuracy in design.
Projection Slice: An Innovative Approach to Creating Unique Geometry
Creating unique shapes in 3D modeling isn't limited to the Knife and Bisect tools. In Blender, you can also effectively use plane projection to achieve original results. For example, you can create a circle with a specified radius and number of vertices, then rotate it 90° around the Y axis. This can be done using the settings that appear in the lower left corner of the viewport when you add an object. This approach allows you to tailor the projection to your specific needs and improves the modeling process, opening up new possibilities for creative design.
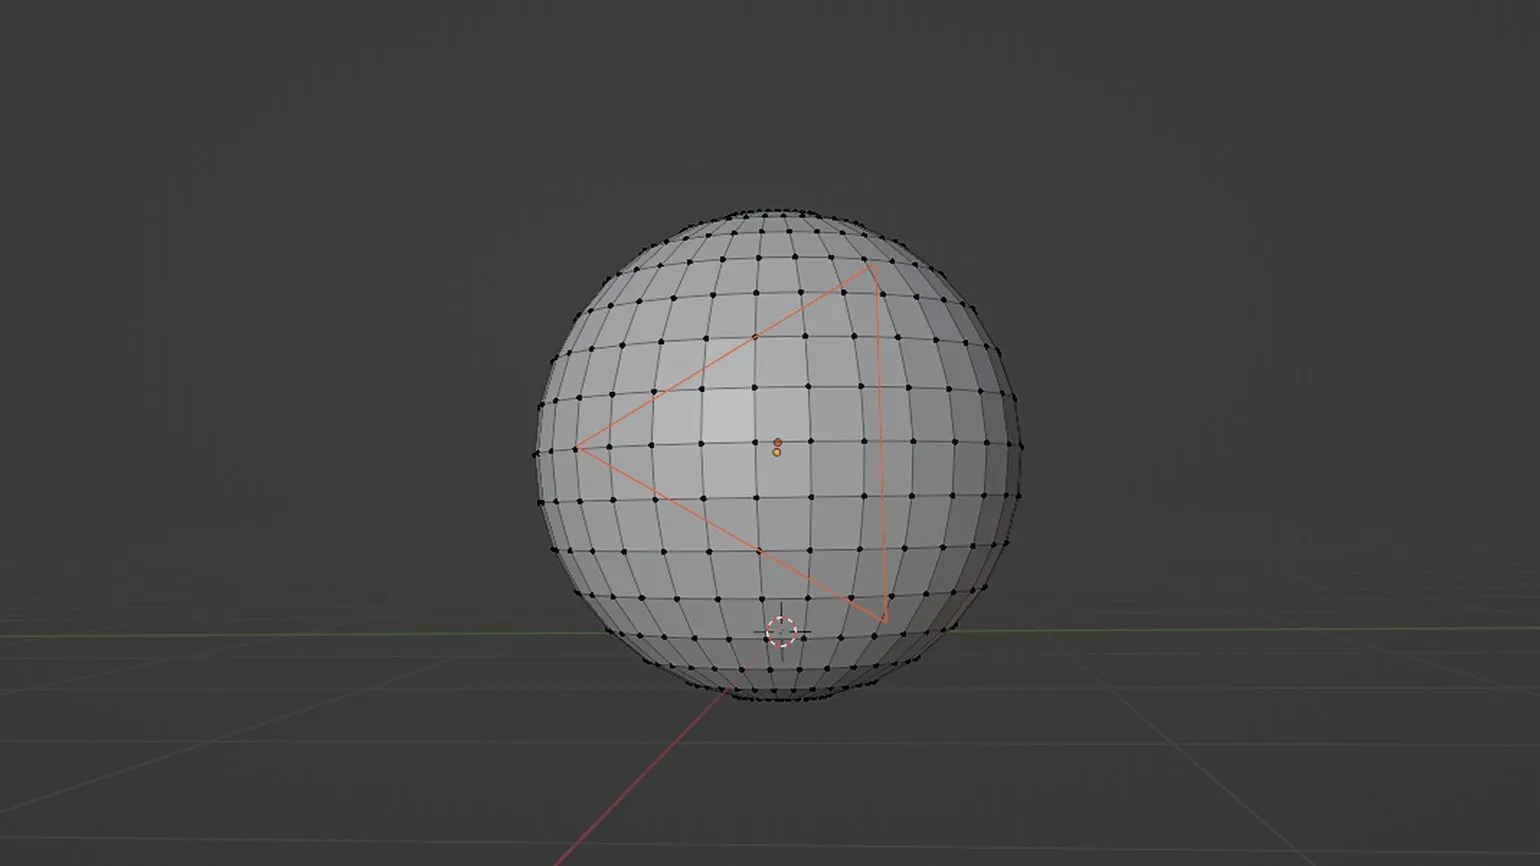
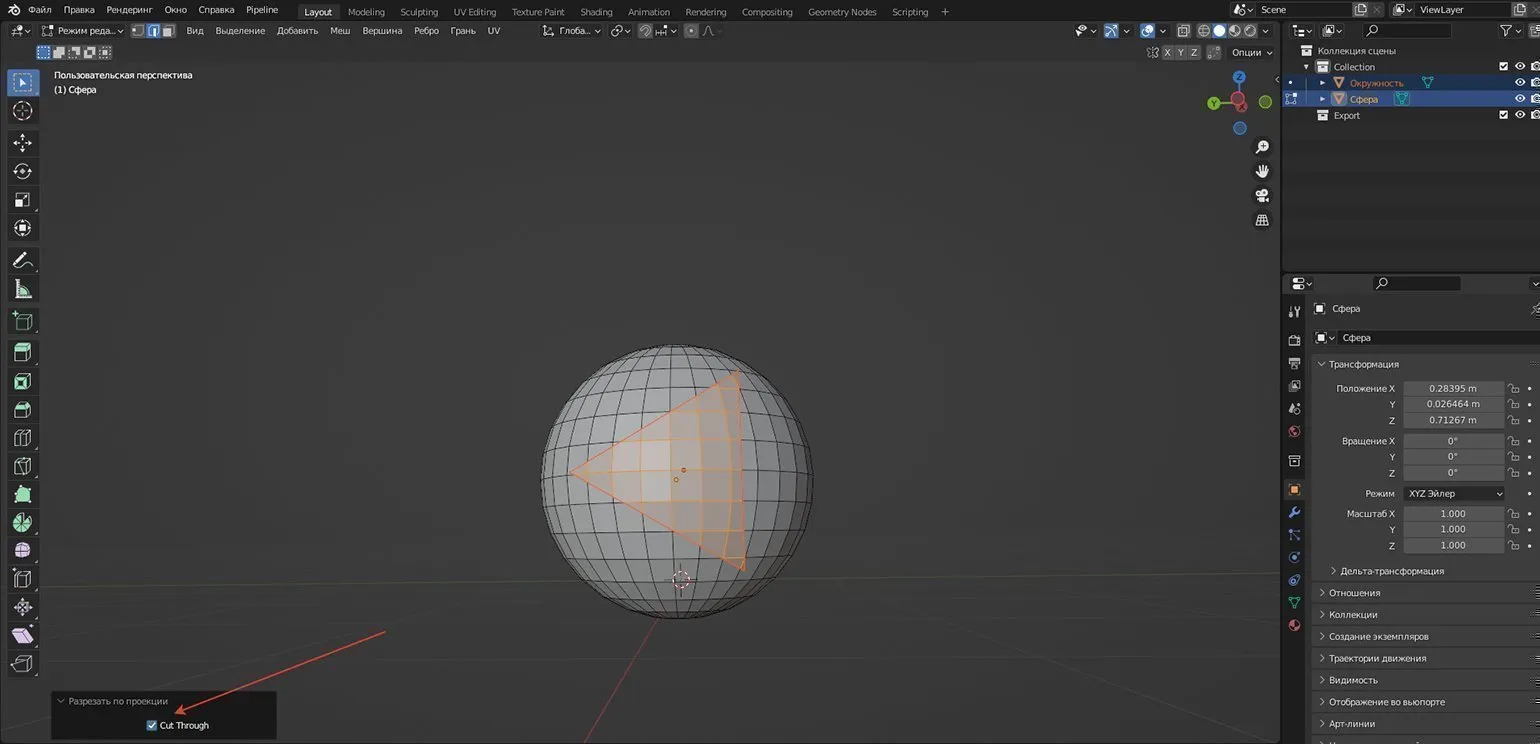
Once you've created the plane, the next step is to project it onto the mesh. To do this, select your mesh in Object Mode, then switch to Edit Mode. Make sure the plane is active in the outliner by holding down the Shift key, and then go to the Mesh tab to select the Cut by Projection option. Following these steps will allow you to accurately transfer the plane's outline to the surface of your mesh, significantly simplifying further work with the model.
This feature is only available in Blender 2.93.4 and higher. In previous versions, you must first select the projecting object, then, while holding down the Shift key, click the object onto which you want to project. After this, go to Edit Mode and use the Cut Through Projection command.
To create a cut-through projection, check the "Cut Through" box in the bottom menu. Note that by default, the viewport may distort perspective, which will cause the back portion of the projection to appear larger. To achieve symmetrical cut-through projection, switch the viewport to orthographic mode by pressing Numpad 5. This will help you get more accurate results and improve the quality of your work with the project.
A variety of projection planes offers a wide range of possibilities for a creative approach in 3D modeling. By experimenting with different settings, you can create original shapes and accentuated elements that will draw attention to your 3D models. Using different projections not only improves visual appeal but also adds depth and complexity to your projects. This opens new horizons for designers and artists striving to create unique content.
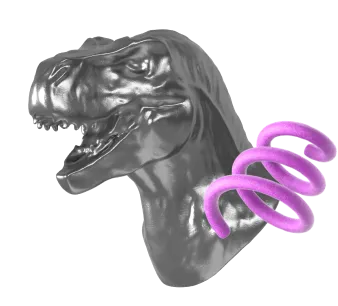
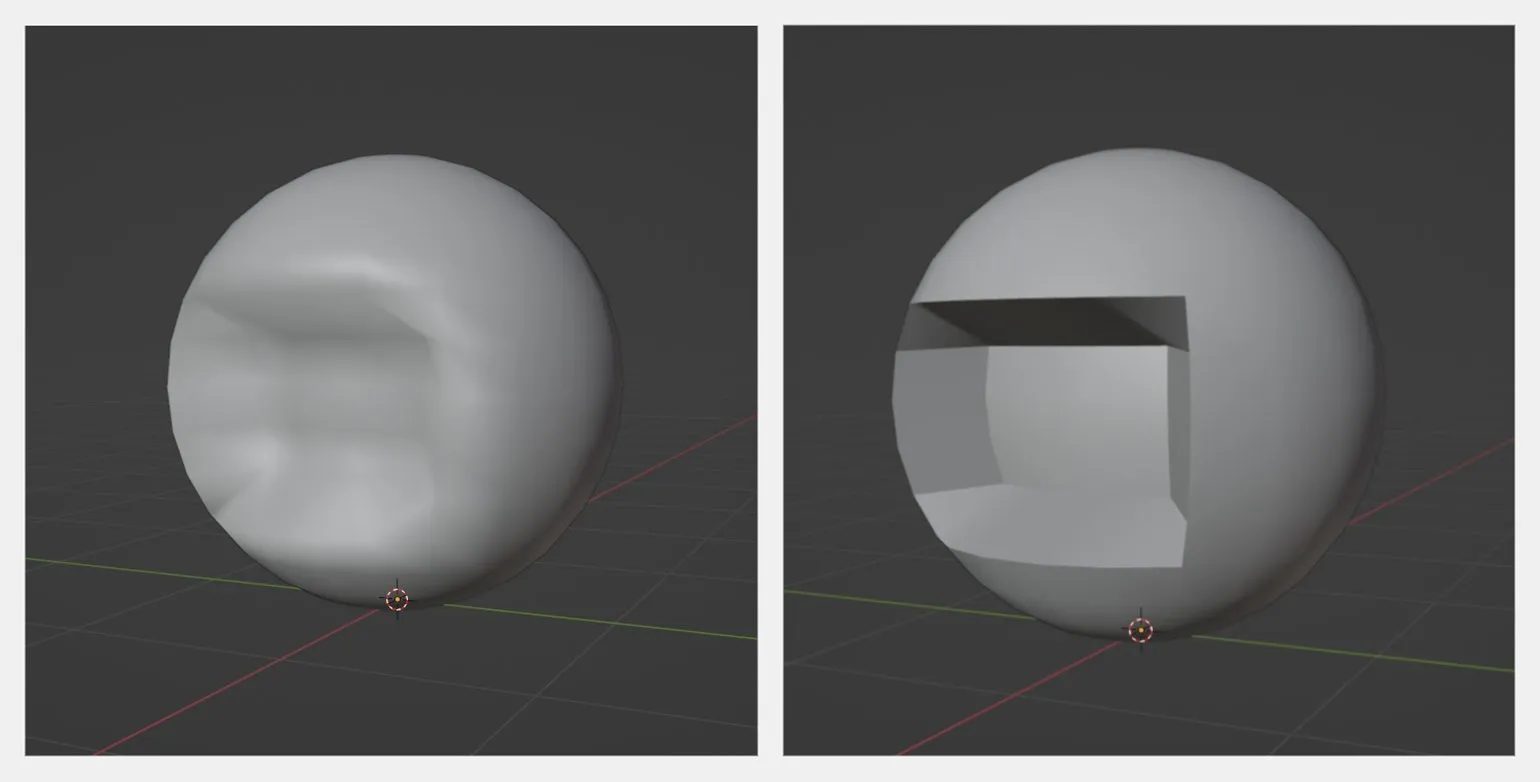
How to Create a Through Hole in 3D Modeling
Creating a through hole in 3D models is a key aspect for achieving high realism of objects. To achieve this, it is necessary to highlight the corresponding faces on both the front and back of the model. After selecting, use the keyboard shortcut Ctrl + E and select the "Bridge Edge Loops" option. This method not only speeds up the modeling process but also ensures clean geometry for your model, which is especially important for subsequent texturing and rendering. Properly creating holes in 3D models improves their visual appeal and functionality.
Proportional Editing: A Revolution in Modeling
When working with 3D models, especially with complex geometry, maintaining proportions is often a challenge. The proportional editing tool effectively solves this problem, significantly simplifying the process of mesh transformation. Using this tool allows artists and designers to precisely adjust the shape of a model without disturbing its original proportions. Proportional editing is especially useful when creating organic forms and details, where maintaining a natural and harmonious appearance is important. Proper use of this tool helps achieve high-quality results in 3D design and modeling.
To activate the powerful proportional editing tool, simply click the "Proportional Editing Objects" icon at the top of your viewport. This function allows you to not only modify a selected section of the model but also affect adjacent areas. This ensures smooth and natural changes to your model, making the editing process more convenient and efficient. Using proportional editing allows you to create more harmonious and realistic forms, which is especially important in 3D modeling.
Adjusting the Proportional Editing Falloff parameter, presented as a graph, allows you to control the degree to which changes affect adjacent areas. This tool provides a wide range of possibilities for creative editing and optimization of your workflow. By experimenting with different graph settings, you can achieve unique results, enhancing the quality and details of your project.
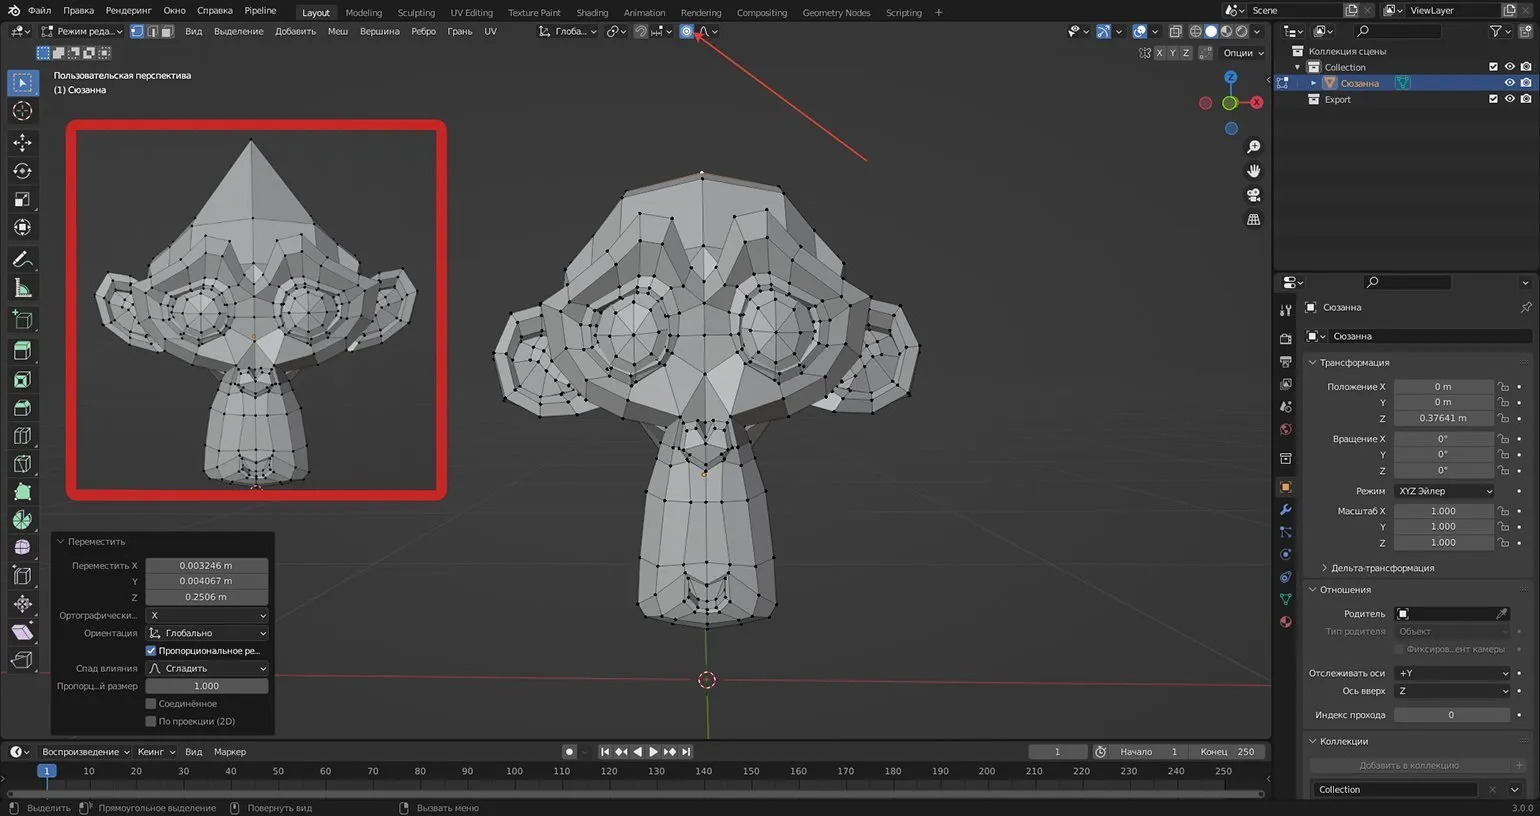
Using proportional editing can improve the quality of your 3D models and significantly streamline your workflow. This tool will become an indispensable assistant in creating expressive and harmonious forms, providing precision and flexibility during editing. Use proportional editing to achieve professional results in 3D design.
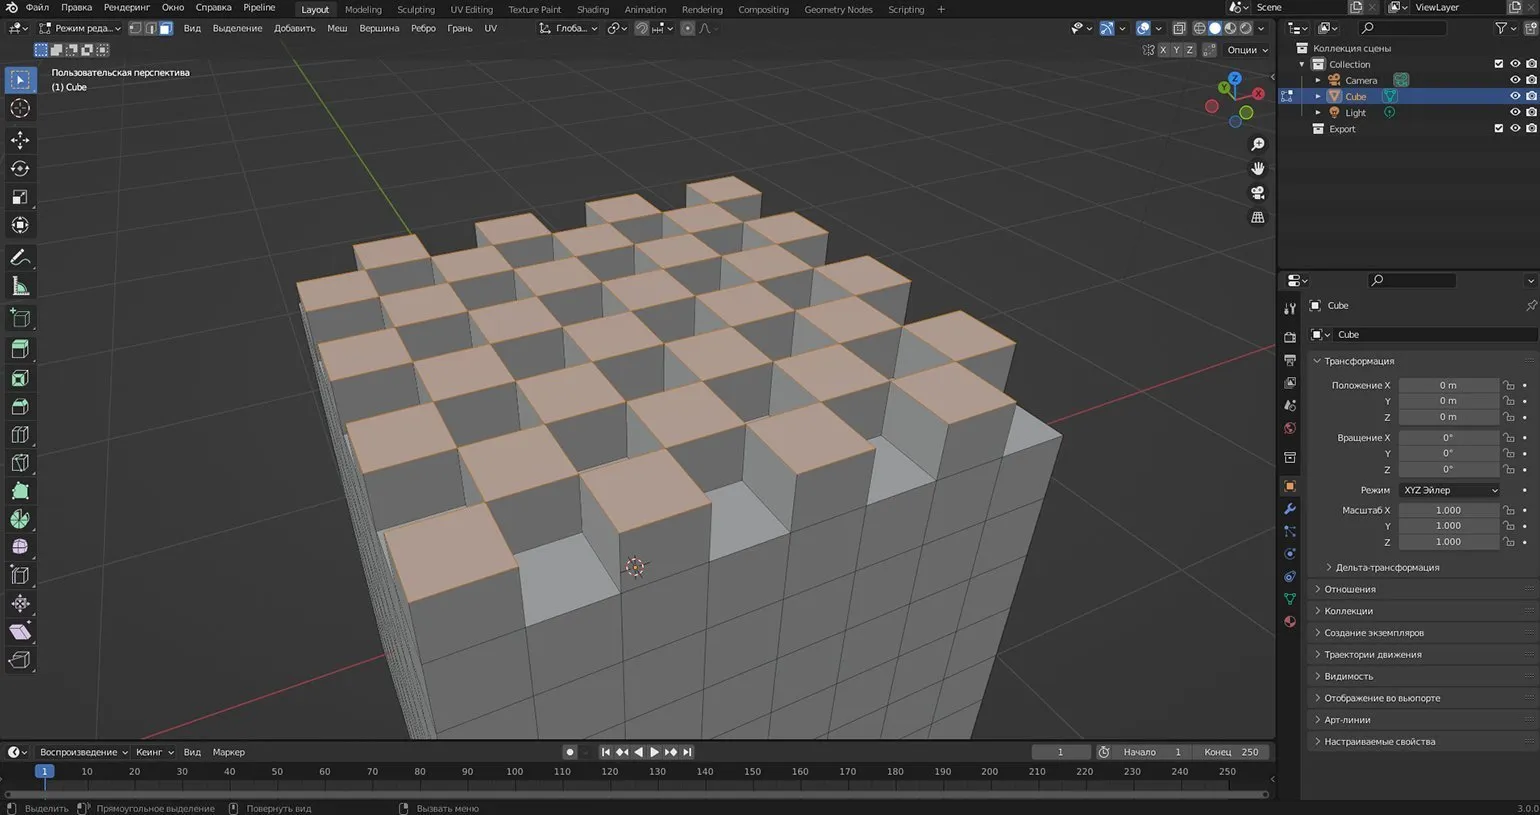
Efficient Selective Selection Methods in 3D Modeling
In 3D modeling, there is often a need to edit individual object faces. To simplify this process, you can use the Checker Deselect function in Edit Mode. This function allows you to quickly and effectively deselect faces, avoiding the need to manually select each one, which significantly saves time and effort when working with models. Using this feature improves your workflow and increases productivity in 3D graphics.
To use this feature, go to the Selection tab and select the Checkerboard Deselect option. In the advanced settings, you can set the preferred number of selected faces, which is especially useful when working with objects with radial symmetry, such as gears. Please note that for optimal results, the number of selected faces should be even. This setting allows you to significantly simplify the editing process and increase the accuracy of working with symmetrical objects.
The checkerboard deselect function is a universal tool that is suitable not only for radial geometry, but also for working with any selected areas of the mesh. It allows users to effectively manage complex 3D models, simplifying the editing process and improving selection accuracy. With this feature, users can easily and quickly modify the parameters of their models, which significantly speeds up the workflow and improves the quality of the final product.
Selective selection in 3D modeling can be greatly simplified using keyboard shortcuts. Select any vertex, edge, or face of your mesh, then hold down the Ctrl key while selecting another element. The program will automatically create the shortest path to the selected endpoint. Numeric parameters and additional options are available in the advanced settings, allowing you to fine-tune the editing process. This approach significantly speeds up the work and improves the efficiency of modeling.
To perform the Fill Region operation, select the desired area and left-click on the end point while holding down the Ctrl + Shift keys. This method significantly speeds up the creation of complex shapes and simplifies the process of working with graphic elements. Using keyboard shortcuts allows you to quickly fill areas, which is especially useful when designing and editing complex images.
Selective selection techniques significantly increase the efficiency of 3D modeling. Using these techniques, you can create more complex and high-quality models with minimal effort. Using selective selection allows you to accurately and quickly select the necessary elements, which makes the modeling process more efficient and productive. These approaches will help you optimize your workflow and achieve outstanding results in 3D design.
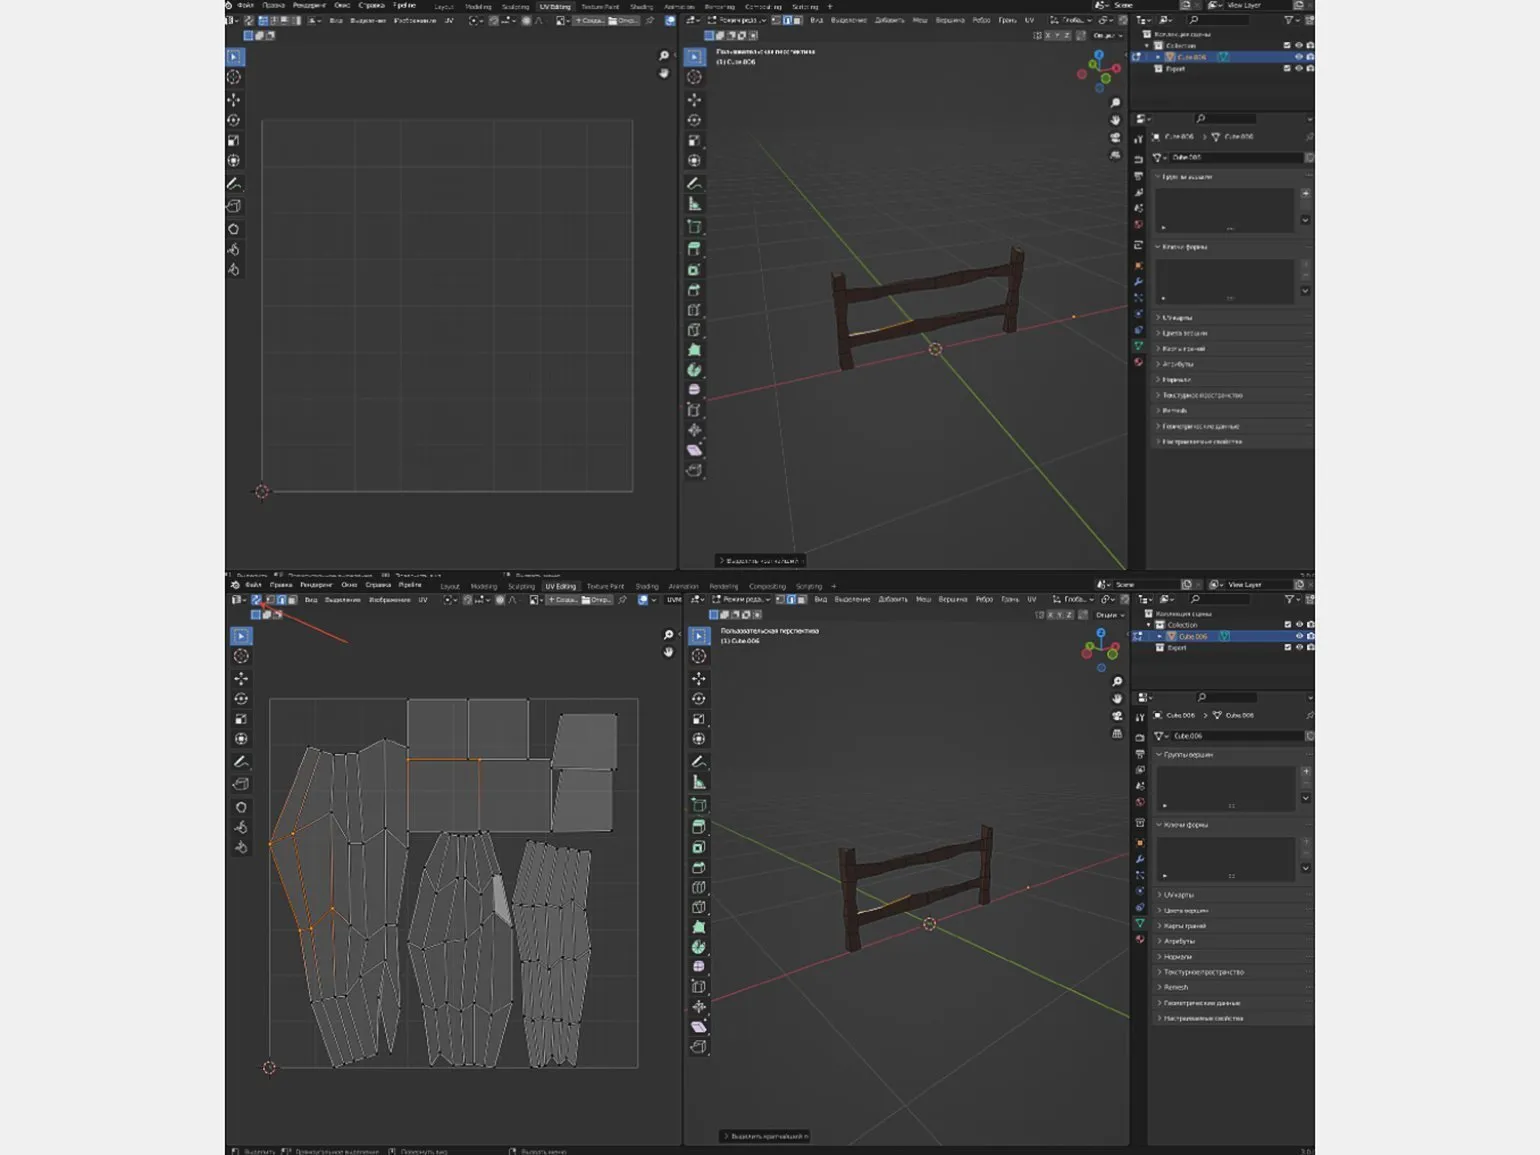
Efficient Use of UV Mapping: Displaying Vertices and Edges
When working with UV maps in 3D modeling, it is important to display selected elements correctly. Typically, UV maps are activated only when an object or its individual faces are fully selected, which can create certain inconveniences. When selecting individual vertices or edges, it is difficult for users to determine which parts of the UV map are being used. However, with a simple step, you can easily solve this problem and streamline the process of working with UV maps. Optimizing the display of UV maps will help you better control the texturing of objects and make the modeling process more efficient.
Click the icon with two arrows to synchronize selections on the UV map. This action will instantly display all the relevant areas, which will greatly simplify texture editing and improve the quality of your work. Synchronization allows for more efficient texture management, ensuring precise alignment between the 3D model and its display.
Symmetry Without Modifiers: Life Hack #7
Creating symmetrical forms is a key element of 3D modeling. The Mirror modifier, which allows you to quickly and efficiently create mirrored objects, is often used for this task. However, there is an alternative method that can significantly simplify the modeling process and improve the quality of the end result. Using this method can speed up your workflow and make modeling more intuitive, which is especially important for 3D design professionals.
To get started, right-click on an object and select Set Origin — Origin to Geometry. Then go to Edit Mode and enable symmetry along one or more axes in the upper-right corner of the viewport. Now all changes you make to the mesh will be automatically symmetrical about the selected axes. This can greatly simplify the modeling process and increase work efficiency, especially when creating complex objects.
You can use this method to work with two identical objects. It is important to ensure that they are precisely aligned along one or more axes. To precisely move objects, use the keyboard shortcuts G + X, G + Y, or G + Z. Combine the objects into a single mesh in Object Mode by pressing Ctrl + J, then set the "Object Center to Geometry" setting. This will improve the management of objects and simplify further work with them.
The move cursor, which is activated in the panel on the left, should be located in the center of the objects. Enter edit mode and enable symmetry along the desired axes, including the one along which the objects are aligned. Then, select the desired areas of one of the objects and apply the rotation, movement, and scaling functions as desired. This will allow you to achieve precise editing and improve the visual representation of your objects.
This method is suitable only for working with existing geometry. If you need to create a new symmetrical shape, be sure to use the Mirror modifier.
Selective Smoothing Technique
To achieve a perfectly smooth surface in 3D modeling, the Shade Smooth function is often used. To use this effect, right-click on the object in Object Mode. However, it's important to remember that this method can blur edges that should remain crisp and sharp. To maintain crisp edges, it's recommended to combine Smooth Shading with normal settings and use other modeling tools that allow you to control the degree of smoothing.
To resolve this issue, go to the Object Data Settings, indicated by the green triangle icon in the right panel. In the Normals section, enable the Auto-Smooth option. This will restore the sharpness of some edges on your object, resulting in improved rendering quality. Adjusting normals is essential for achieving high-quality rendering and creating realistic models.
If you'd like to soften sharp edges, you can change the smoothing angle, which is 30° by default. This setting allows you to customize the smoothing level to suit your individual needs and preferences. Adjusting the smoothing angle allows you to achieve smoother and more aesthetically pleasing shapes, which is especially important in design and development. Adjust the smoothing angle for the optimal visual perception of your project.
Creating Symmetrical Forms Using Radial Symmetry
When working in Sculpt Mode, you often need to create symmetrical accents around a circle. This helps achieve a harmonious and balanced design in the model. To set up radial symmetry, go to the Active Tool and Workspace Settings. Find the screwdriver and wrench icon in the right panel, then select the Symmetry tab. In this section, you can specify the axes of symmetry, as well as set the number of symmetrical sections for your model, which will greatly simplify the sculpting process and increase work efficiency.
Effective Life Hacks for Working with Blender
MatCap is an essential tool for visualizing objects in Blender. It's not just a decorative feature, but a critical element that helps identify imperfections on a model's surface. With MatCap, you can test different lighting styles and materials, which is especially useful during the modeling phase. This option is available in the shading settings when selecting the Solid shading type. Using MatCap can significantly improve the quality of working with 3D models and speed up the development process.
Using various MatCaps, you can effectively detect model imperfections before texturing and shading. This will significantly save your time and effort during the work process.

Knowing useful life hacks greatly simplifies working in Blender, allowing you to focus on the creative aspects of projects. In this article, we'll discuss unique and simple visualization techniques that will help you get the most out of Blender. These tips will speed up your workflow and improve the quality of your projects, opening new horizons for creativity and professional growth.
Reading is an important part of our lives, and it opens the door to new knowledge and ideas. Immersing yourself in books, articles, and other sources of information helps develop your thinking and broaden your horizons. In today's world, where information is available in large quantities, it's important to be able to filter and analyze what you read. Reading is not only entertaining but also promotes personal growth, improves memory, and concentration. Furthermore, regular reading helps improve writing and communication skills. Therefore, it's worth setting aside time for books and other materials that can enrich your experience.
Blender Tutorials: Learning the Interface, Navigation, and Basic Operations
Blender is a powerful tool for 3D modeling, animation, and rendering. Understanding the program's interface is the first step to successfully mastering its capabilities. In this lesson, we'll cover the basic elements of the Blender interface and learn how to navigate the workspace effectively.
The Blender interface consists of several key areas: the toolbar, timeline, 3D rendering window, and other controls. Each of these areas plays a vital role in the process of creating 3D objects and animation. We'll discuss in detail how to customize the interface to suit your needs and use it for maximum productivity.
Navigating in 3D space is an important aspect of working in Blender. We'll teach you basic commands and gestures that will help you easily move, rotate, and scale objects. Proper navigation significantly speeds up the modeling and animation process.
Basic operations in Blender include creating and editing objects, applying materials and textures, and setting up lighting. We'll cover each of these operations in detail so you can create high-quality 3D work.
Learning the interface, navigation, and basic operations in Blender is the foundation for further mastery of more complex techniques and the program's capabilities. Start your journey in the world of 3D design with these essential lessons and discover new creative horizons.
3D Generalist: Master 9 Key Skills for Success
Want to become a versatile 3D specialist? Learn how to master 9 essential programs and achieve success in film, gaming, and advertising!
Learn more