
Contents:

Excel and Google Sheets: A Free Course for Beginners
Learn MoreEfficient Data Sorting in Excel: A Step-by-Step Guide
Sorting data in Excel is a key tool for structuring information in tables. When data is presented in a disorganized format, sorting helps organize it effectively according to specific criteria. This significantly simplifies the analysis process and allows you to quickly find the data you need. Using sorting functions in Excel not only speeds up work with large amounts of information but also improves the accuracy of analysis, making this tool indispensable for users seeking effective data management.
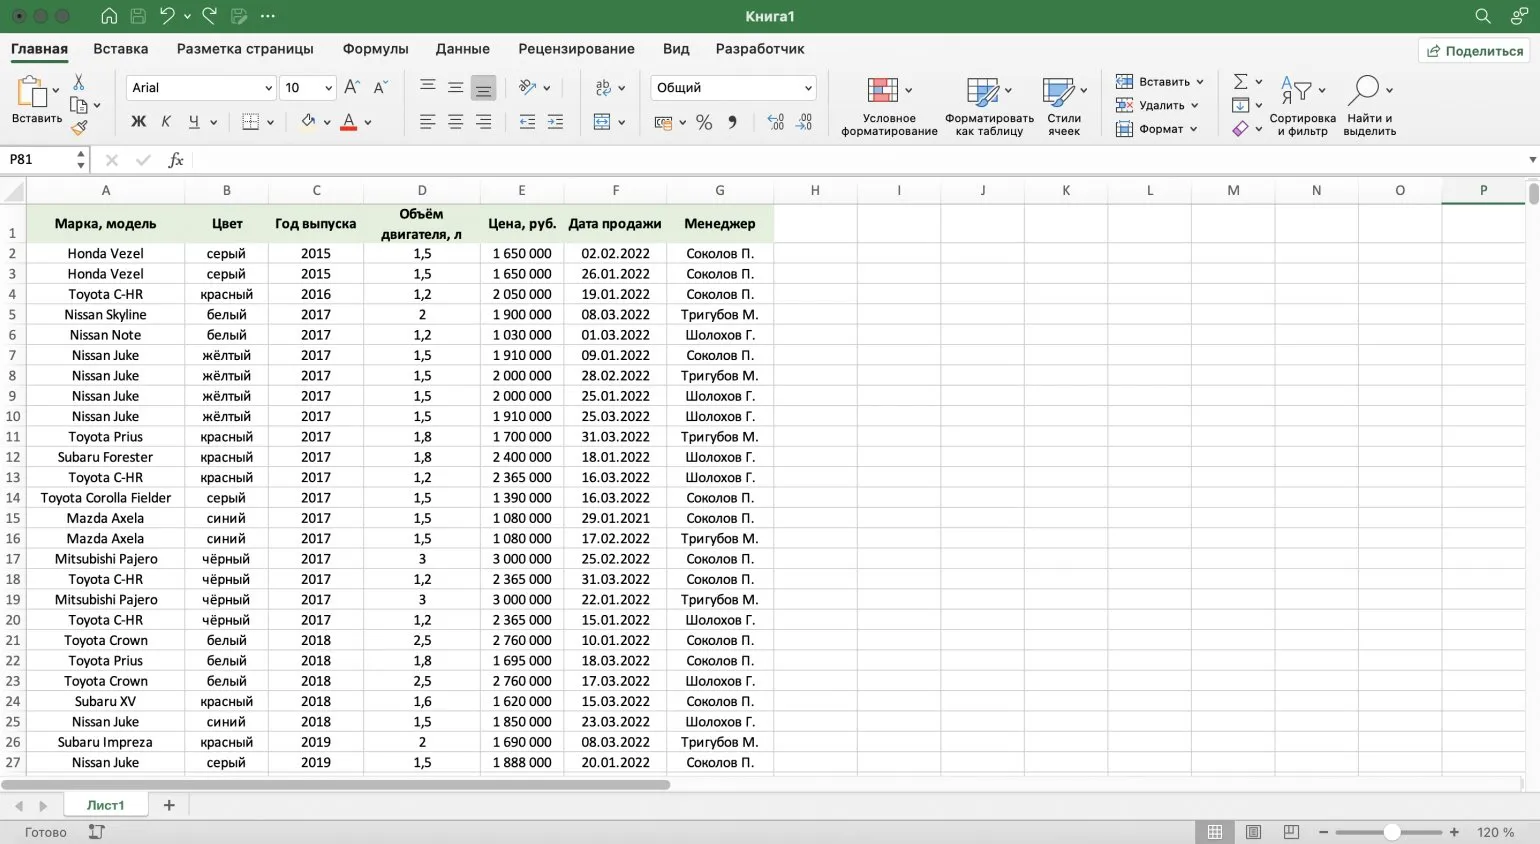
In this guide, we'll take a detailed look at the data sorting process using a report from a small car dealership as an example. This report contains important information about car sales, including specifications, prices, sale dates, and the names of sales managers. We'll show you how to effectively organize and organize this data to simplify analysis and decision-making. Sorting information will help highlight key aspects and improve sales management at the car dealership.
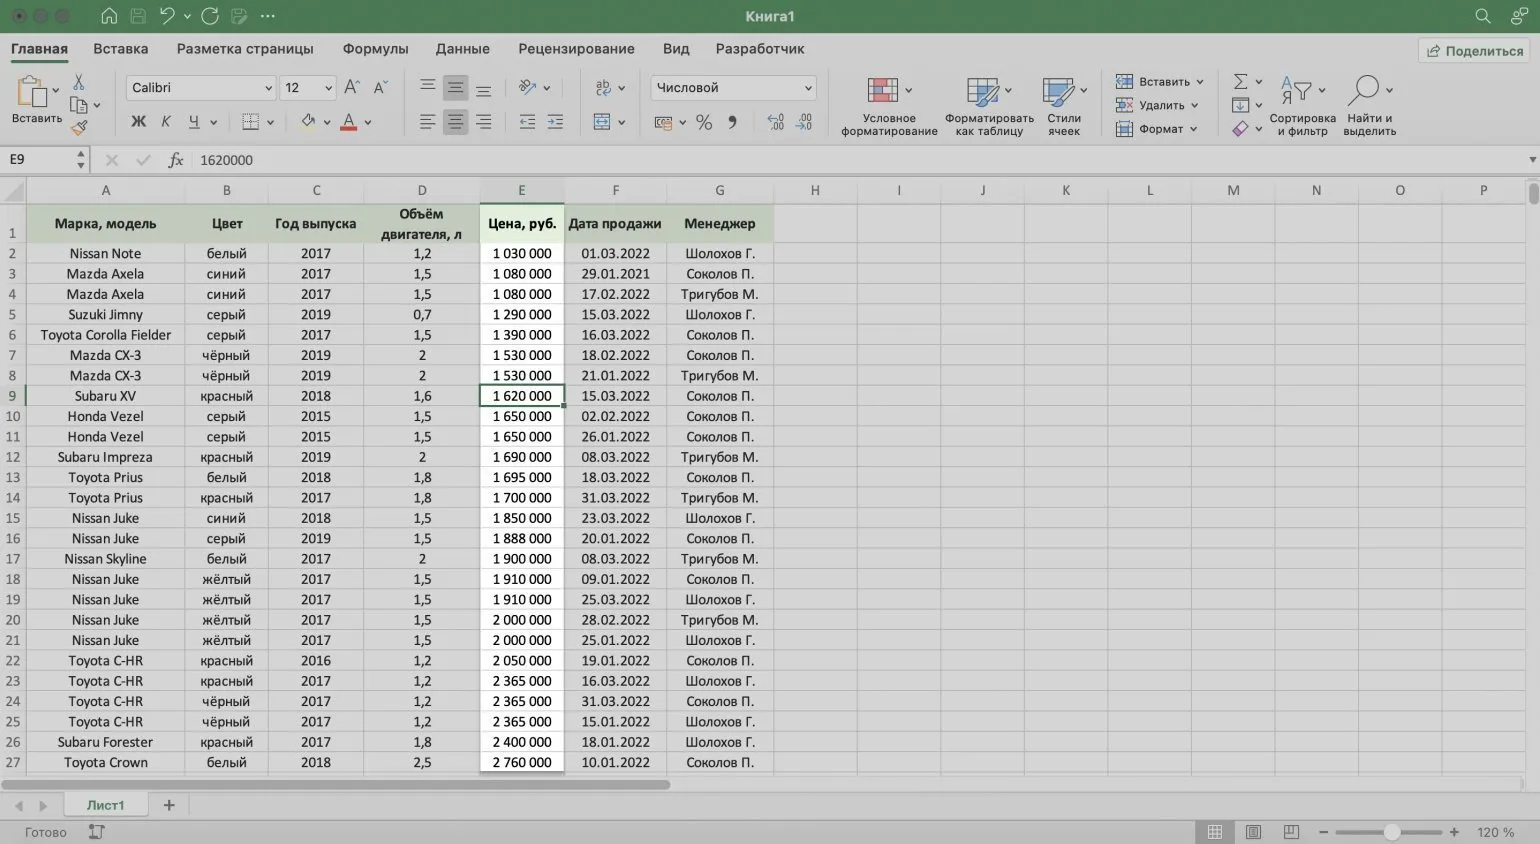
Let's start by sorting the car data by ascending price. To do this, select any cell in the column that corresponds to the price—in this case, the "Price, rubles" column. This will organize the information and make it easier to search for cars by specified criteria, which is especially useful when comparing models and making purchasing decisions. Correct data sorting helps you better navigate the price range and choose the most suitable options.
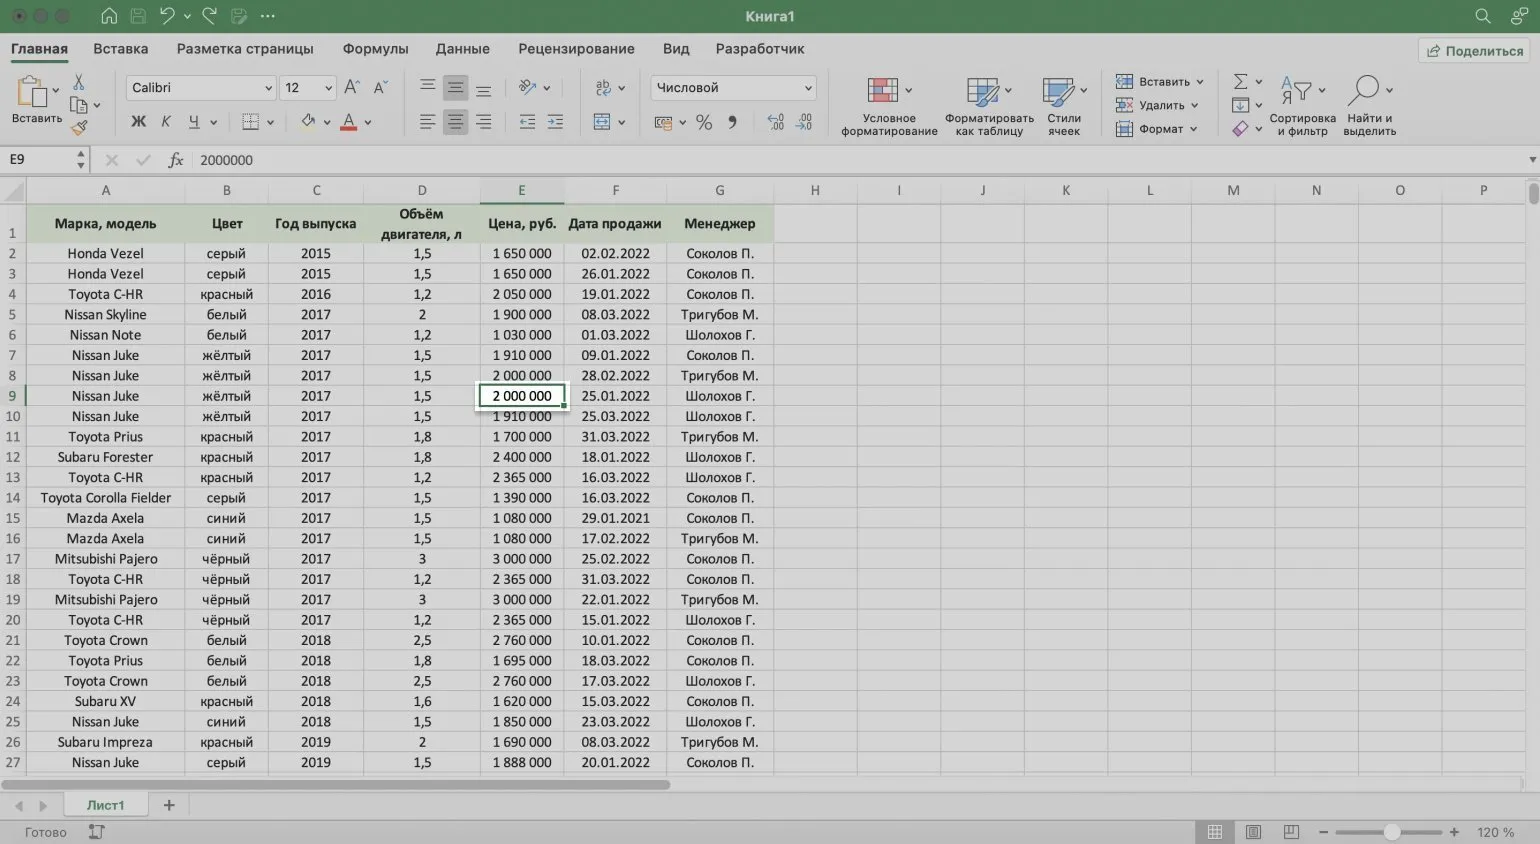
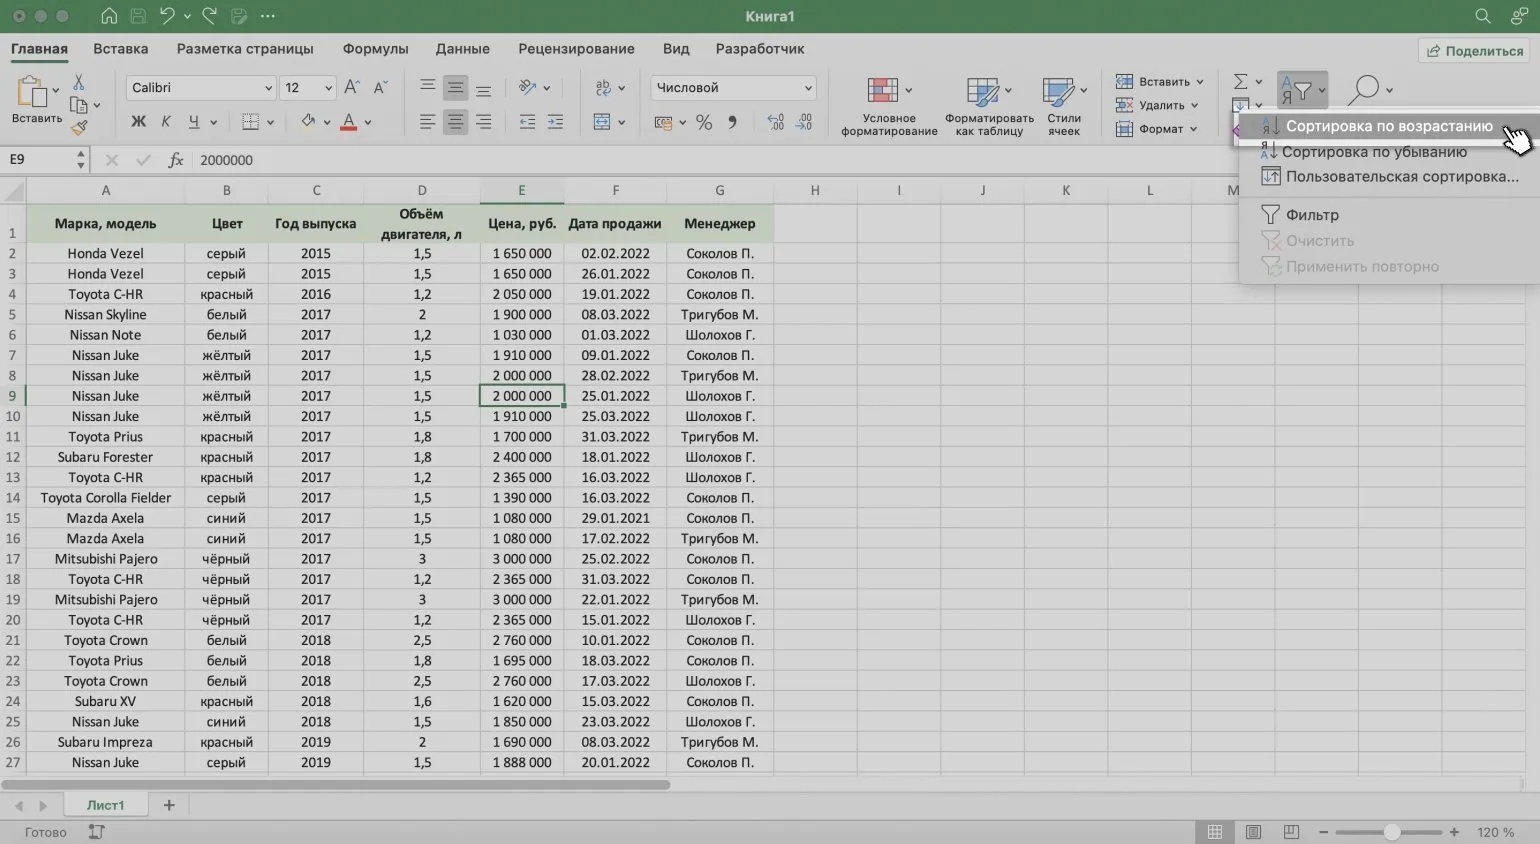
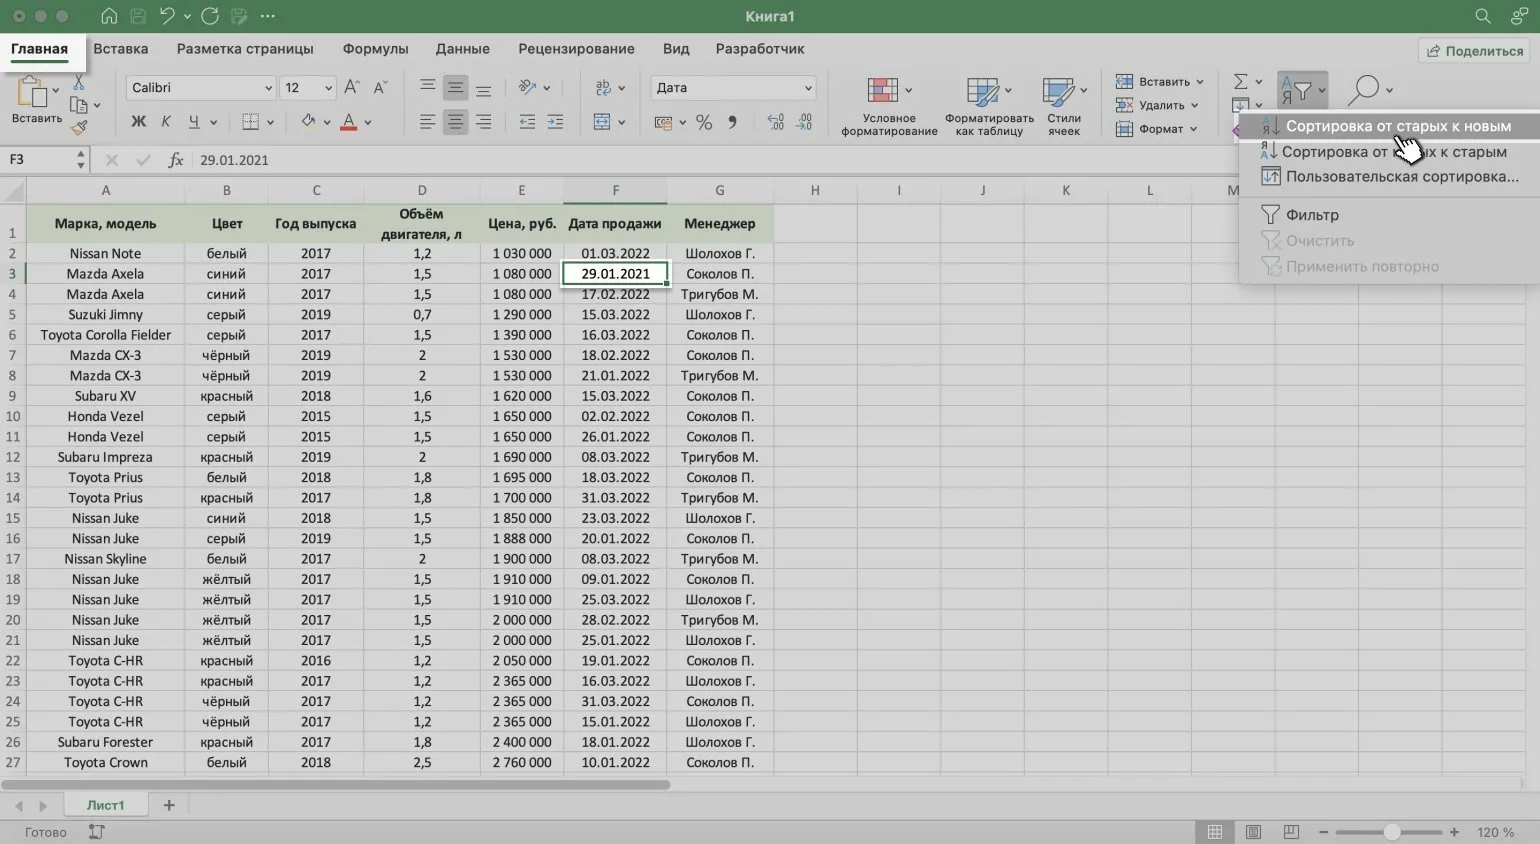
On the "Home" tab, click the "Sort and Filter" button to open the sort type selection menu. This will allow you to conveniently organize the data in the table, improving its perception and analysis.

We select ascending sorting to organize the table data by car prices. This will make it easy to find available options and compare the prices of different models. Sorting cars by ascending price helps users quickly navigate offers and make an informed choice.
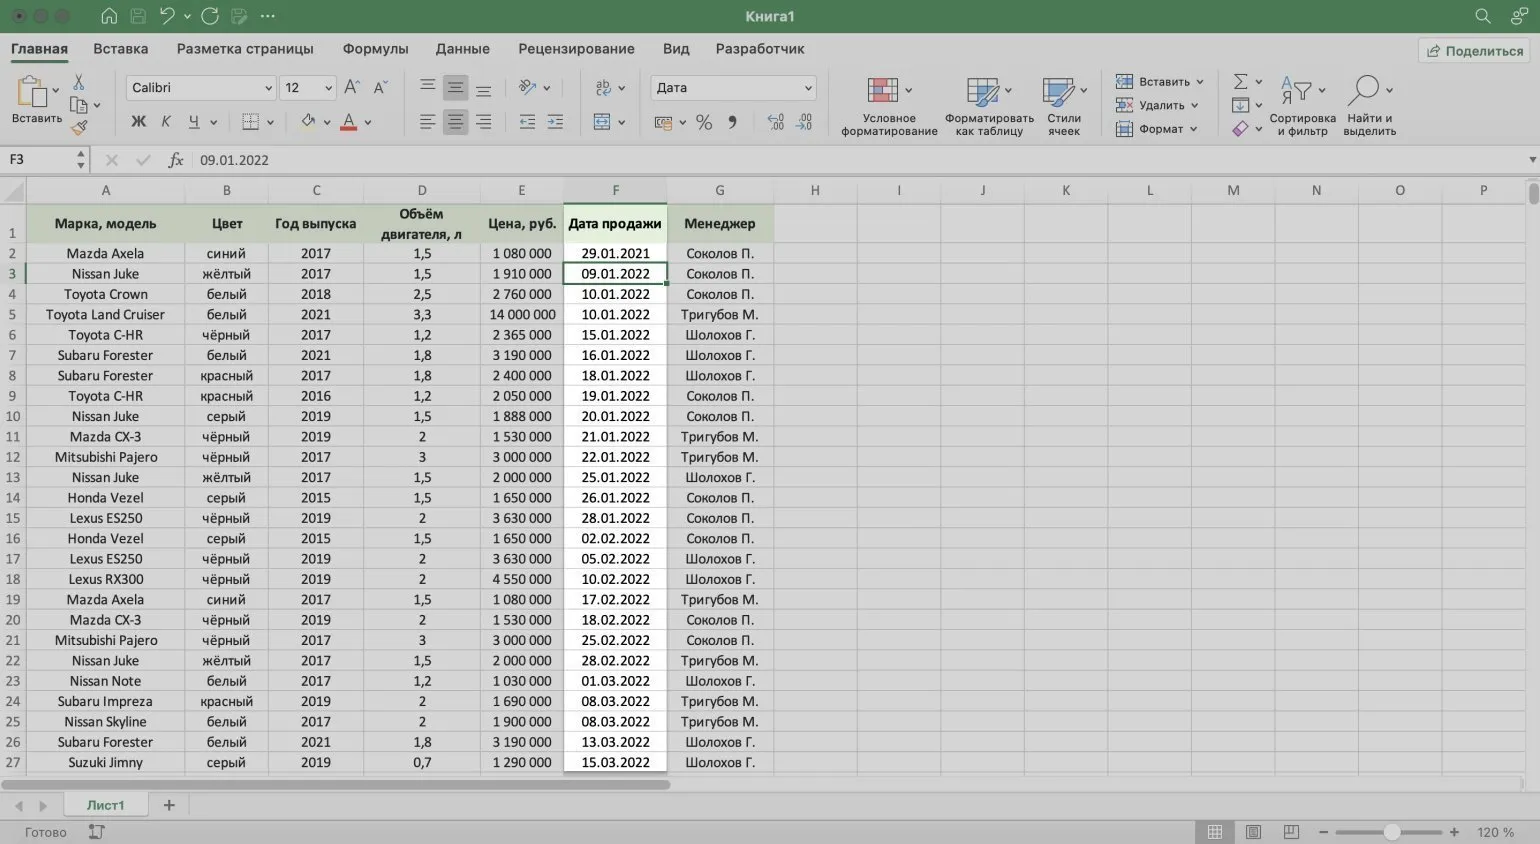
Now let's sort the data by car sale date. To do this, select a cell in the "Sale Date" column. Then click the "Sort & Filter" button and select the "Sort Oldest to Newest" option. This process will allow you to sort the records by sale date, which will facilitate data analysis and help you better understand car sales trends. Sorting by sales date is an important part of working with spreadsheets, as it allows you to identify trends and draw informed conclusions.
The data has been successfully sorted by sales date, starting with the earliest and ending with the newest. This approach makes it easy to analyze sales dynamics and identify trends over time.
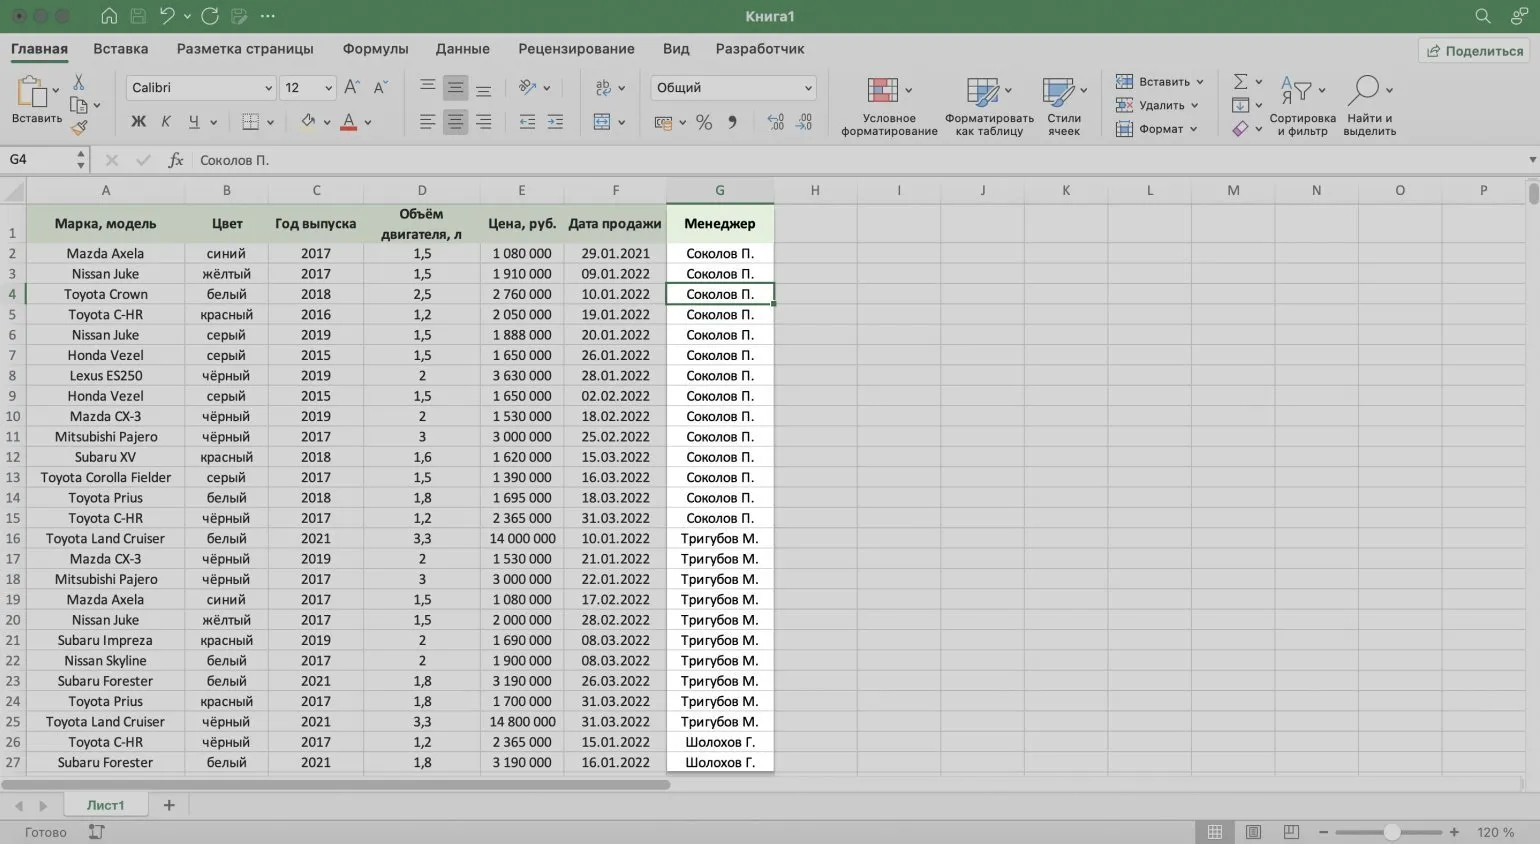
Now let's discuss sorting data by manager last names. To do this, select a cell in the "Manager" column, then click the "Sort and Filter" button and select "Sort A to Z." This will sort the records alphabetically, making it much easier to find the information you need and improving the usability of the data. Sorting by last name helps you quickly find the right managers and analyze their performance.

The data has been successfully sorted by the managers' last names, which greatly simplifies their analysis. Now the information is presented in a more structured form, which allows you to quickly find the necessary information and conduct a more effective assessment of the team's work.
Efficiently sorting data in Excel by various criteria greatly simplifies working with tables and helps you quickly find the information you need. By following simple steps, you can organize your data optimally. For more detailed information about Excel capabilities, visit the official Microsoft website.
Efficient Sorting in Excel: How to Sort Data by Multiple Columns
Sorting data in Excel is a key tool for analyzing information. Previously, we looked at how to sort by a single column. However, in practice, it is often necessary to sort tables by several criteria simultaneously. Multi-criteria sorting allows you to more accurately organize and analyze data, which greatly simplifies the process of decision-making and identifying patterns. Proper data sorting in Excel helps improve information visualization and increases the efficiency of working with spreadsheets.
In this article, we will explain in detail how to sort in Excel by two criteria. This will significantly simplify data processing and improve the efficiency of your work with spreadsheets. Sorting by multiple criteria in Excel helps organize information, making data analysis more convenient and faster. We will provide step-by-step instructions that will help you master this function and optimize your workflows.
You have a table with sales reports, and you need to sort it by two key parameters: the price of cars in ascending order and the names of the salespeople. This approach will allow you to quickly and effectively analyze the data, improving your understanding of sales dynamics and identifying key specialists. Proper data sorting not only optimizes the analysis process but also helps you make more informed decisions to improve sales efficiency.
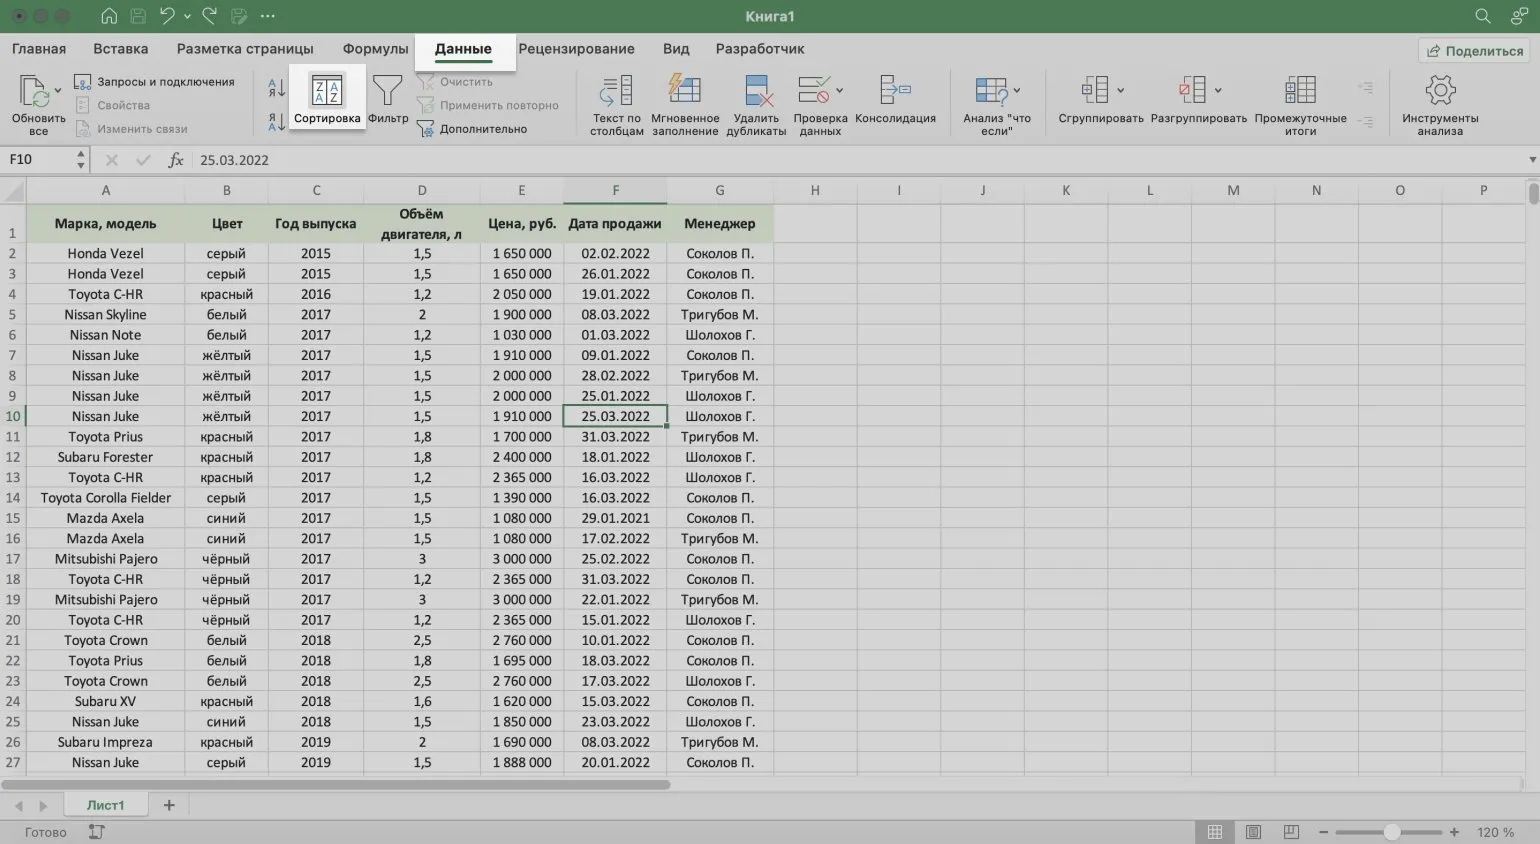
To begin, select any cell in the table. Then, go to the "Data" tab and click the "Sort" button. This will allow you to organize the data in the table according to the selected criterion, which will greatly simplify working with the information. Sorting helps you quickly find the data you need and analyze it.
In the window that opens, functions for adding sorting criteria are available. To do this, click the "+" button.
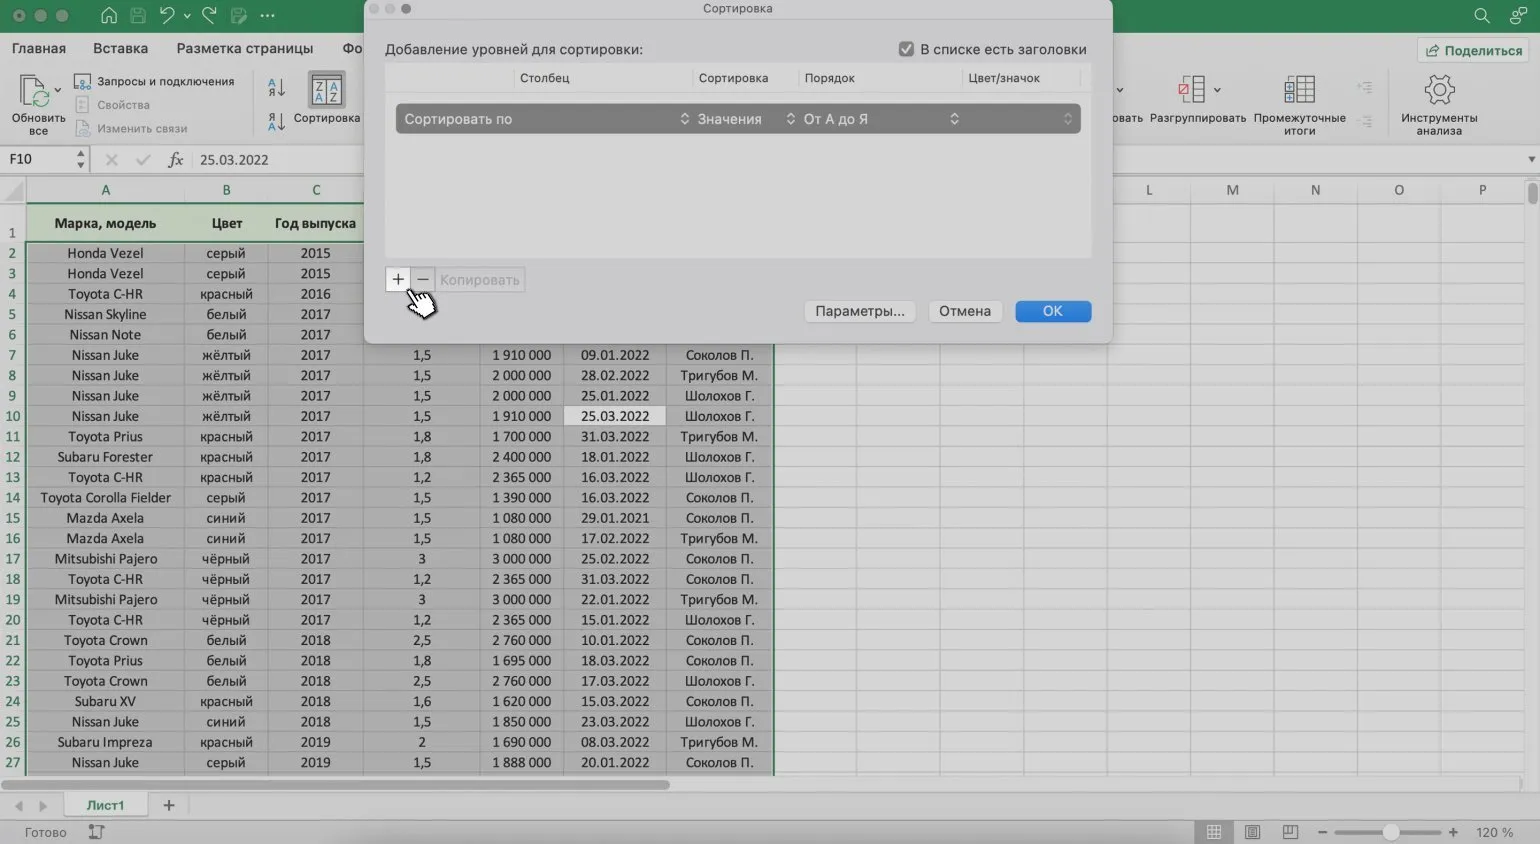
To optimize your data, start by sorting by manager last names. Then, sort by ascending car prices. This sorting order will provide easier access to the information you need and simplify data analysis.
To do this, click the arrows under "Column" and select "Manager." Under "Order," select "A to Z" to sort the data alphabetically. This will help you organize information and simplify navigation.

Click the "+" button to add a second filter criterion: "Price, RUB", and set the parameter to "Ascending". After that, confirm the changes by clicking the "OK" button.
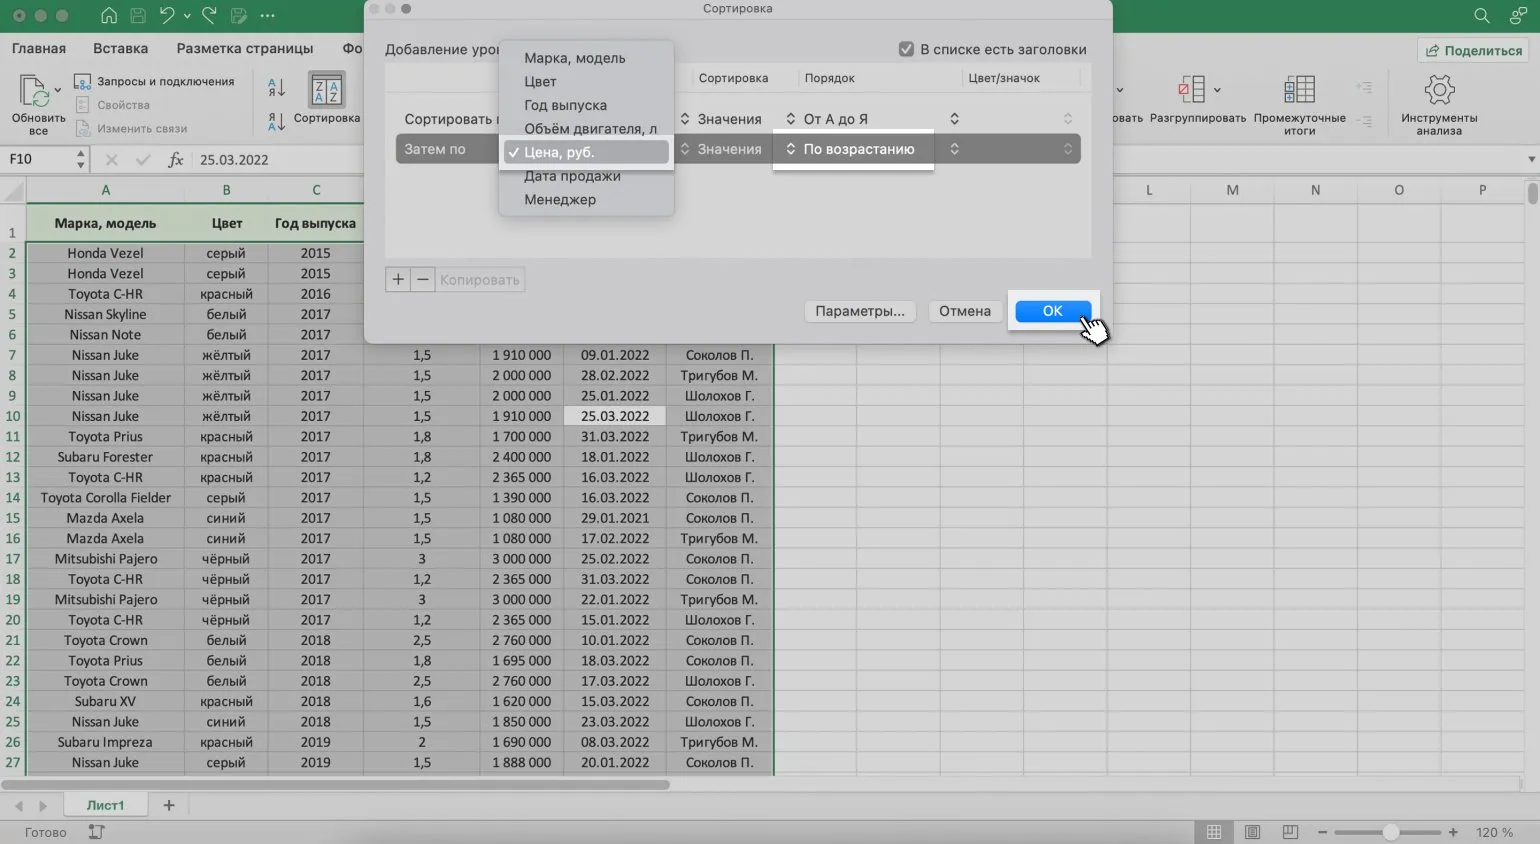
Congratulations! Your table has been successfully sorted by two criteria: manager names and ascending car prices. This will allow you to easily analyze the data and make informed decisions when choosing a car. Proper data sorting significantly simplifies working with tables and improves the efficiency of analysis.
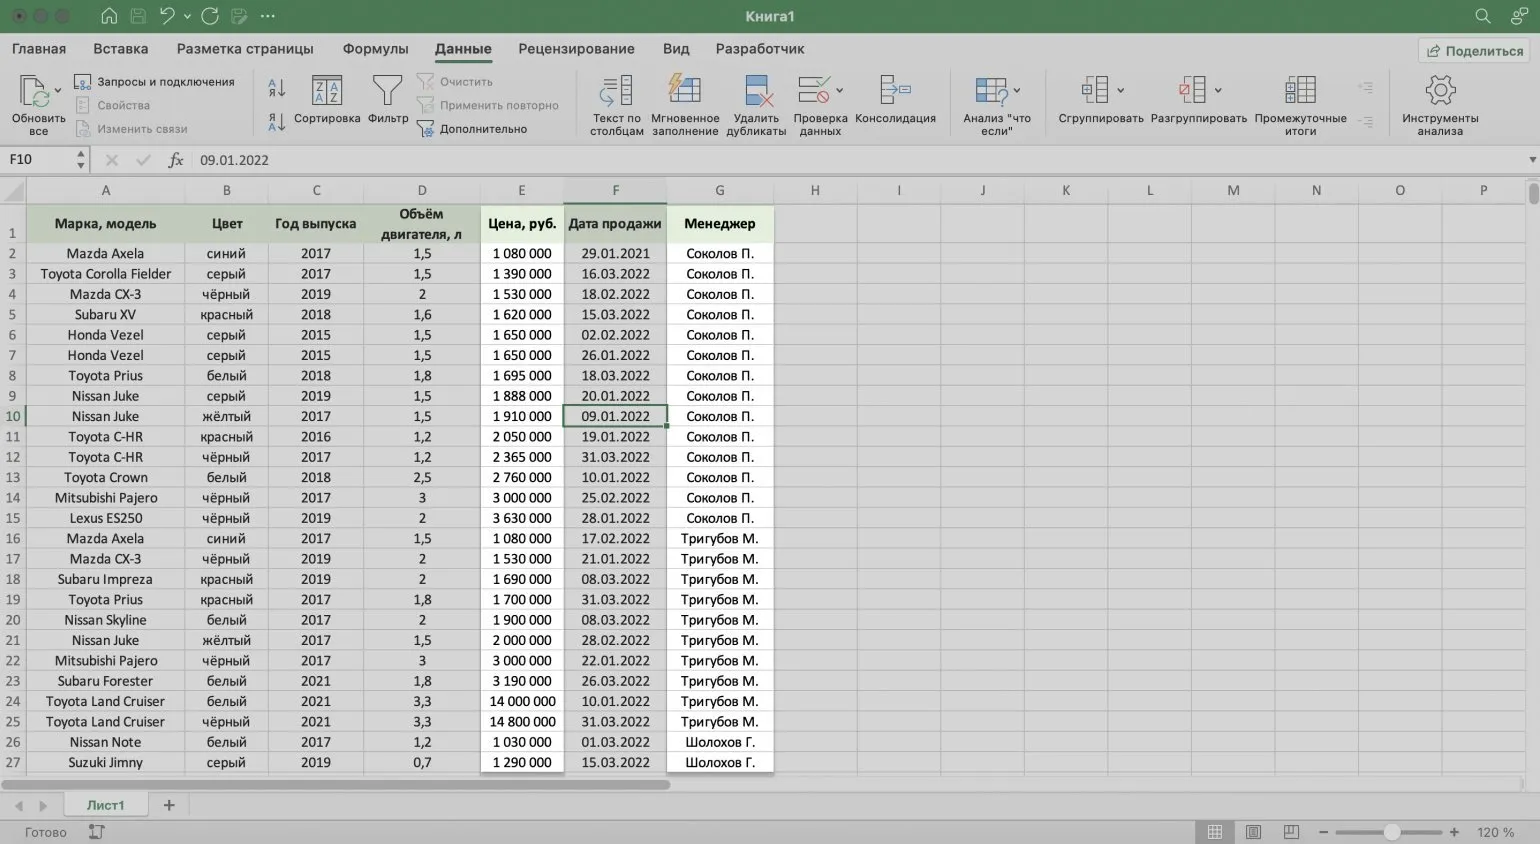
Using the sort function in Excel allows you to effectively manage large amounts of data and quickly find the information you need. This feature provides a convenient way to organize data, which helps improve the analysis and visualization of information. Sorting data in Excel helps users streamline their workflows by simplifying access to important information and improving overall productivity when working with spreadsheets.
For more detailed information on working with Excel, it is highly recommended to consult the official Microsoft documentation on the Microsoft Support website. Here you will find useful guides, tips, and solutions that will help you improve your skills in this program.
How to Perform a Custom Sort in Excel
Modern Excel users often face the task of sorting data by non-standard criteria. Standard sorting functions allow you to arrange data in ascending, descending, alphabetical, or date order, but sometimes more flexible methods are required. In such situations, the custom sorting feature comes to the rescue, allowing you to customize the sorting order according to specific requirements. This feature is especially useful when working with large amounts of data, where not only proper sorting is important, but also the ability to highlight specific categories or values. Using a custom sort, you can create individual lists and set priorities, which greatly simplifies the analysis and processing of data in Excel.
A custom sort provides the ability to sort data by individually defined criteria that are not available in the standard settings. This can include sorting data by employee positions or department names, which greatly facilitates the process of analyzing information. Setting up a custom sort allows you to more precisely organize your data, improving its perception and facilitating decision-making based on analysis. Using this feature can improve the efficiency of working with information and provide a deeper understanding of the structure of the data.
The process of custom sorting in Excel involves a few simple steps. First, open the sheet containing the data you want to sort. Then, select the range of cells you want to sort. On the Data tab, Select the 'Sort' option. In the window that opens, specify the column by which to sort, and select the order—ascending or descending. If necessary, you can add additional sorting levels for more complex data. Once you have completed the settings, click 'OK' to apply the sort. Proper data sorting in Excel helps improve the perception of information and facilitates data analysis.
- Create a new list for sorting and enter the column values in the desired order.
- Use the standard sorting tools to apply the settings.
Let's look at an example based on a table with car models. We'll start by creating a new list that will allow users to sort the data according to their preferences.
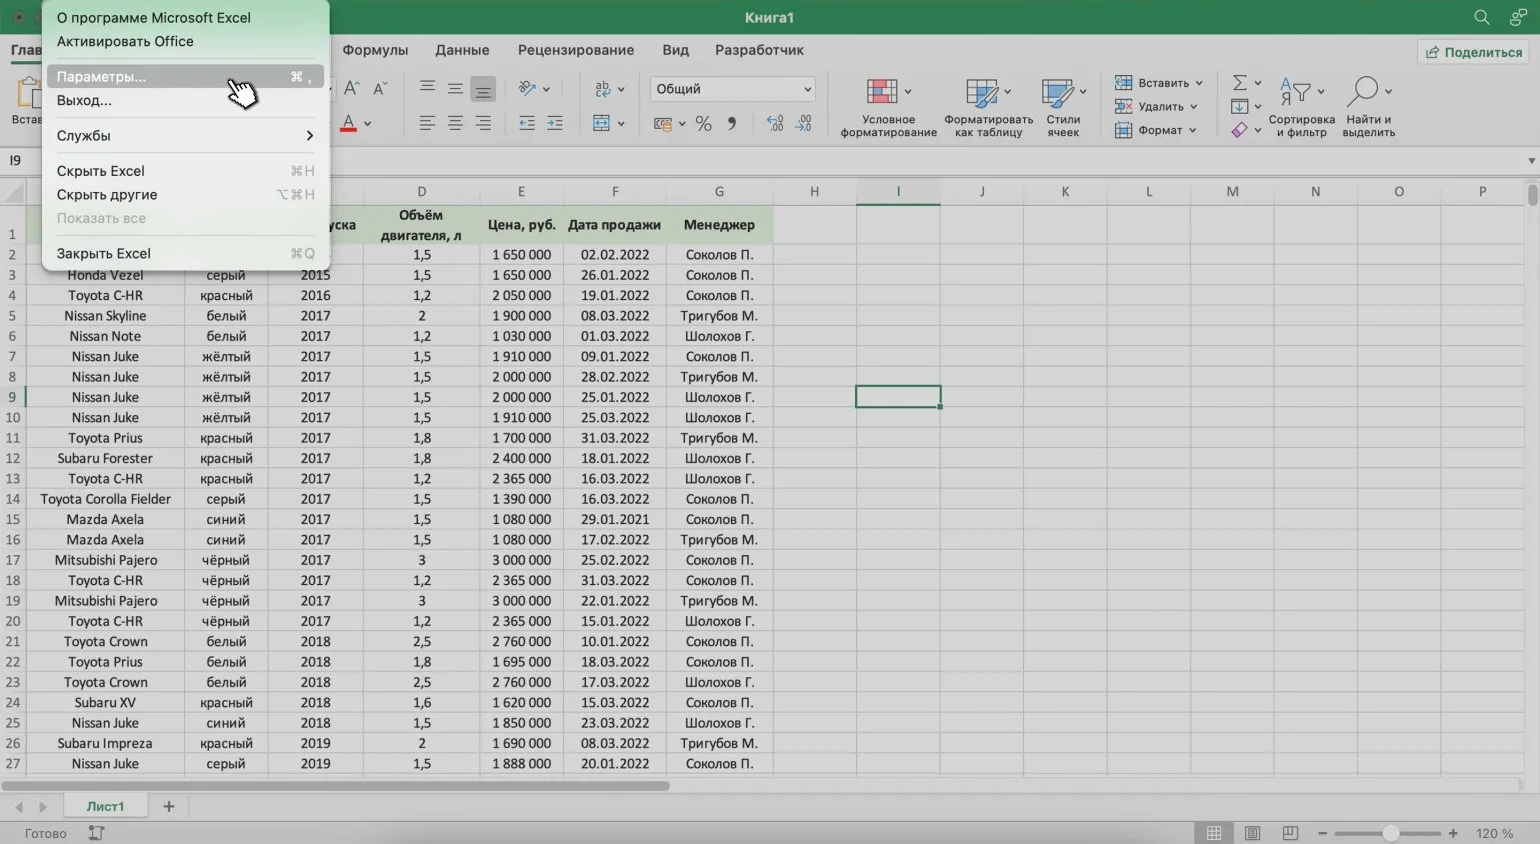
For macOS users, the process begins by selecting the "Excel" tab in the top menu, then clicking "Options...". This action opens access to settings, allowing you to optimize your experience with the application and customize it to your individual needs.
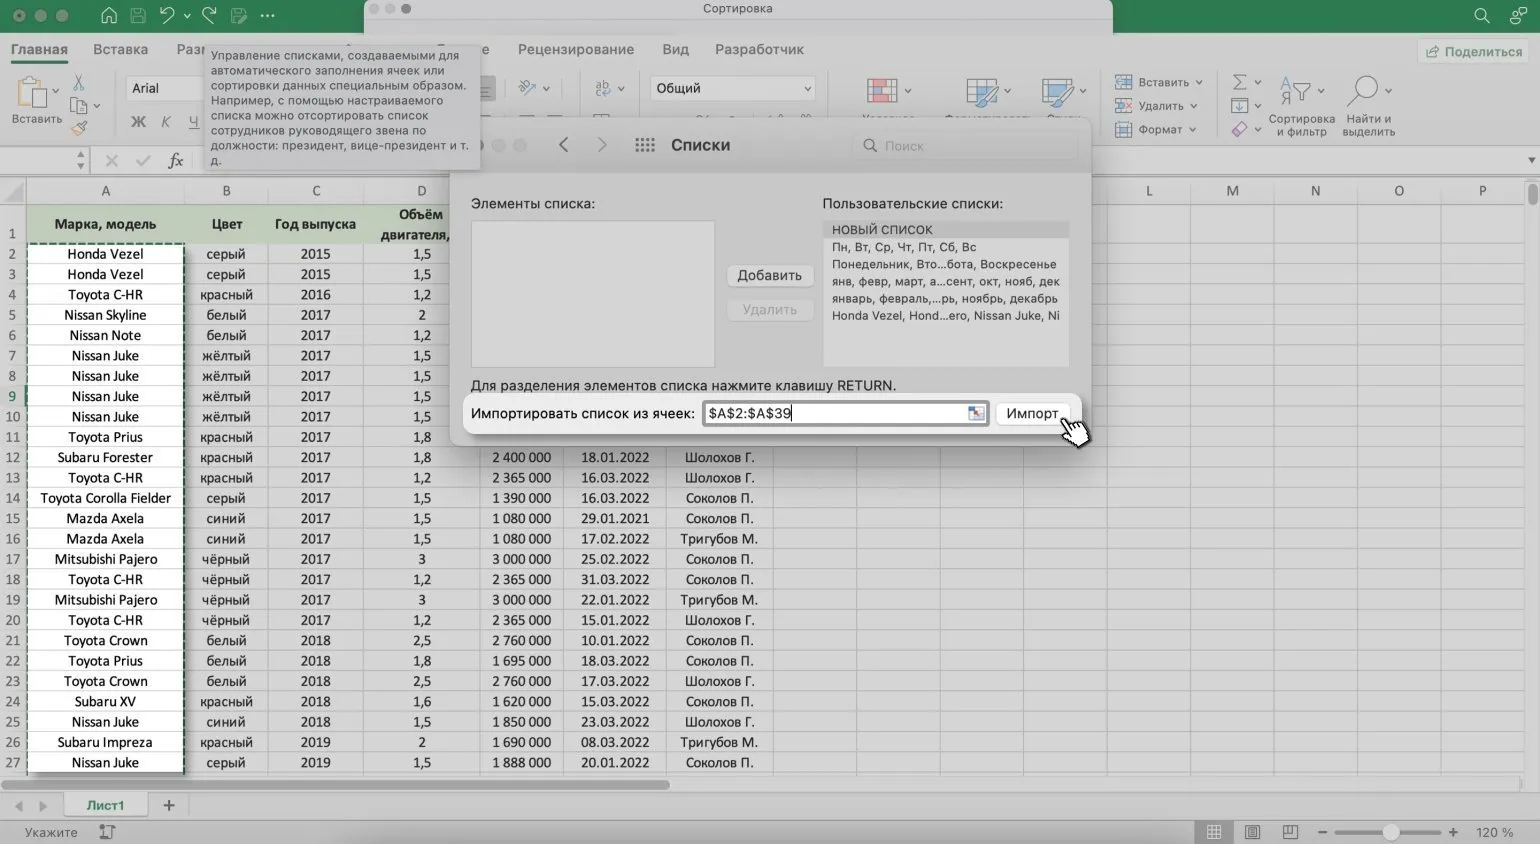
In the window that appears, select the "Lists" button.

In the right panel, select the "NEW LIST" option under "Custom Lists." Then, in the left panel, enter the list items in the desired order. This process will allow you to effectively organize your content and improve its perception.

List items can be added in two main ways. The first method involves using standard HTML tags, such as <ul> for unordered lists and <ol> for ordered lists. The second method involves dynamically creating lists with JavaScript, which allows for more flexible control over content and user interaction. Proper use of these techniques can significantly improve the structure and readability of your content, as well as enhance its SEO optimization.
- Manual entry of values.
- Import from an existing table and then adjust it.
Let's consider the second option. Place the cursor on the "Import list from cells" row and select the column range to sort by. In this case, it is the "Make, Model" column. Correctly sorting the data in the table will help organize the information and facilitate its analysis.
After this, you need to click the "Import" button.
Excel automatically imports all values from a column, including duplicates. This can lead to undesirable situations, especially when analyzing data. If you want to avoid importing duplicate values, consider using Excel functions to clean your data before importing. Functions such as "Remove Duplicates" or filters can help you extract unique values and improve the quality of your analysis. Proper data handling in Excel is essential for obtaining accurate and reliable results.

Now it is important to remove duplicate values and arrange them in the desired order. For example, you can use sorting algorithms or built-in programming language functions to automate this process. Removing duplicate elements not only simplifies data analysis but also improves its comprehension. Proper sorting and uniqueness of values helps to achieve greater efficiency in working with data, which is especially important in tasks involving processing and analyzing information.

Click the "Add" button to create a new list that will appear in the "Custom Lists" panel. After that, close the window.

The process of editing lists is different for Windows users. You should go to the "File" section, then select "Options," then "Advanced," and then select "General." Then select the "Edit Lists" option. All subsequent steps are similar to the processes described previously.
Now you can sort the table according to the list you created. To do this, select any cell in the table and click the "Sort" button on the "Data" tab. This will allow you to organize the data in the table, making it much easier to analyze and work with.
In the window that opens, under "Column," select the column you want to sort. In this case, it will be "Make, Model." Please note that proper data sorting will help you analyze information more effectively.
In the "Order" section, select the sort list you previously created to optimize the presentation of data.
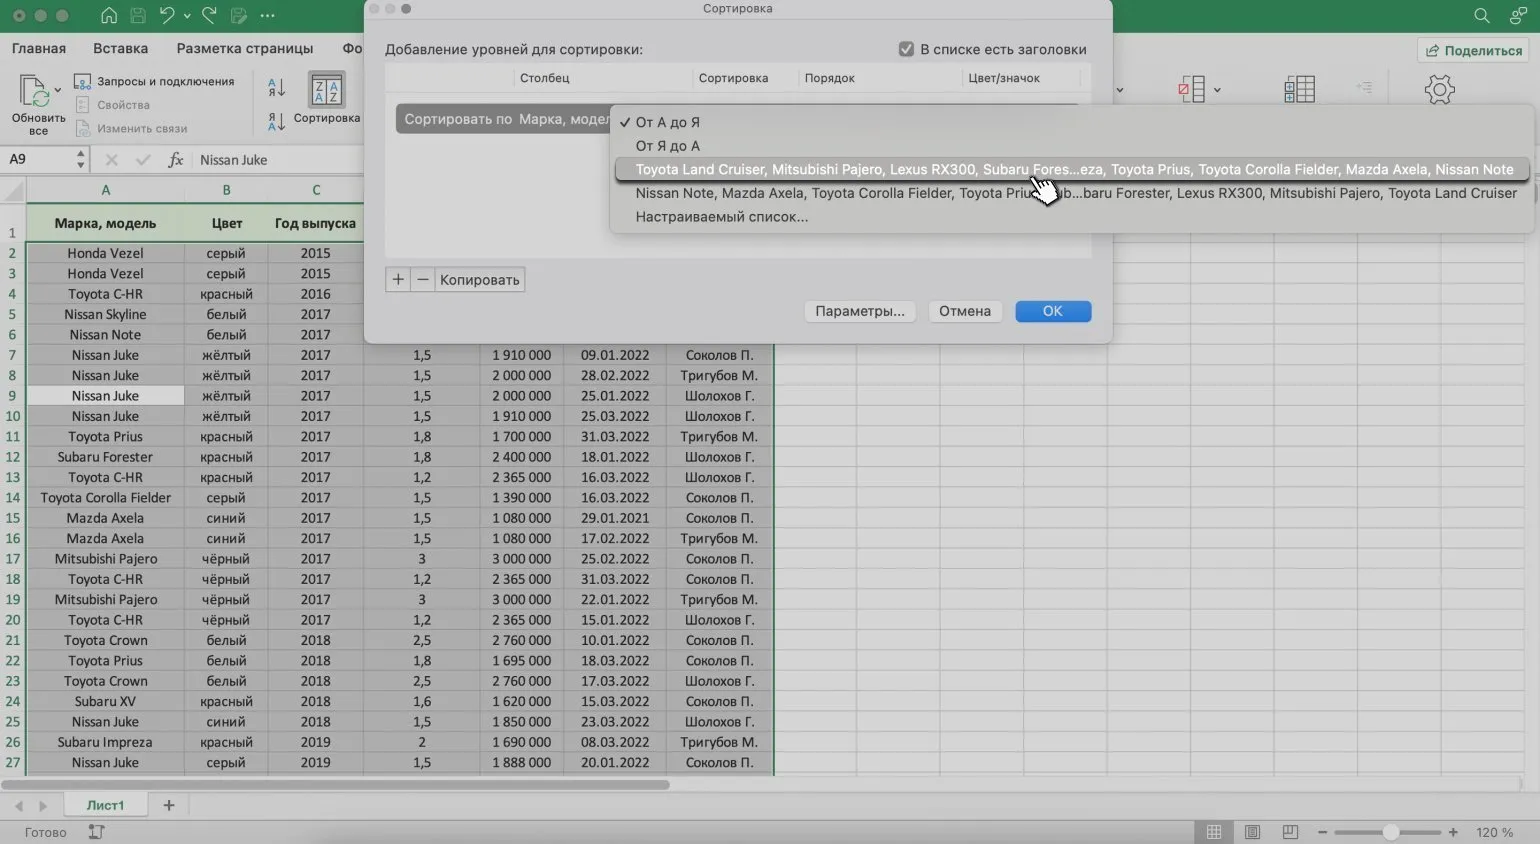
Click the "OK" button to confirm the action.

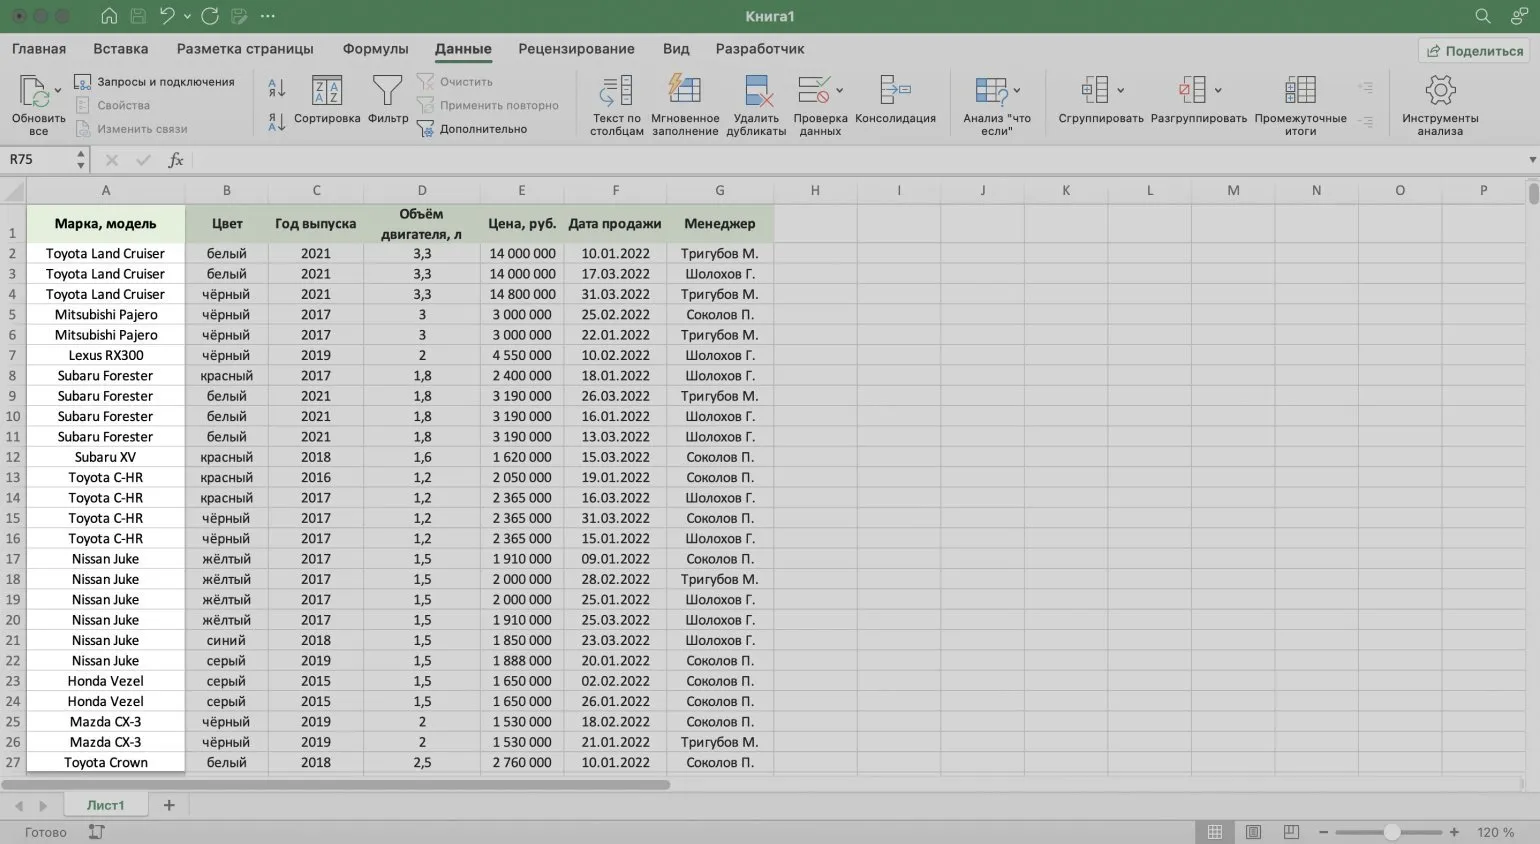
The table is now sorted according to your criteria. The values in the "Make, Model" column are ordered according to the order you set for the new list. This simplifies the search for the necessary information and makes working with data more convenient and efficient.
Additional Excel Resources from Skillbox Media
Skillbox Media offers a variety of Excel resources to help you improve your Excel skills. Our collection includes training materials, video courses, and hands-on exercises covering all aspects of Excel, from basic functions to complex analytical tools. These resources are suitable for both beginners and experienced users looking to expand their knowledge and improve their productivity. Explore our materials and become an Excel expert with Skillbox Media.
- Instructions: How to merge cells and data in Excel
- Guide: How to use VLOOKUP in Excel to transfer data between tables
- Instructions: How to freeze rows and columns in Excel
- Guide to creating drop-down lists in Excel to simplify entering repeating data
- Instructions: How to create and customize charts in Excel
Excel and Google Sheets: 7 Steps to the PRO Level
Want to become an Excel and Google Sheets master? Learn 7 key skills to automate your work and quickly generate reports!
Learn more